There are many reasons why a user may need an account to access your WordPress website. Perhaps they maintain your site or its content. Or, they could be customers of your online store. Membership sites are another common example. What if you need to grant temporary access for an expert to help you troubleshoot an annoying bug with their plugin or theme? Follow along as we explore WordPress user roles and capabilities.
Not everyone will need the same level of access, however. For example, you wouldn’t want your customers to have the power to install plugins or change settings, as that’s a security risk, not to mention a fine recipe for having your website badly broken.
The good news is that WordPress has a user roles and capabilities system built into the software. Each role comes with a separate set of capabilities. It protects your site by limiting what users can do while logged in.
This article will introduce you to WordPress user roles and capabilities. We’ll look at the various roles and who they’re meant for. In addition, we’ll look at creating new custom roles and editing existing ones.
Ready to learn more about managing your site’s users? Let’s get started!
Default WordPress User Roles and Capabilities
WordPress includes several default user roles, each covering a common usage scenario. The highest-level roles (Administrator/Super Admin) have the most permissions. The capabilities are reduced for each subsequent role.
Let’s take a quick look at the default roles and the types of tasks they can perform. We’ll list them in order from most to least powerful.
Note: For a full rundown of capabilities, check out the WordPress Capability vs. Role table.
Super Admin
The Super Admin role is reserved for WordPress Multisite installations. These users have access to every aspect of WordPress.
They can create new network sites, manage users, install plugins, and change network settings. In addition, they have access to administrative tasks on individual network sites. Super Admins may also manage content for each site.
It’s the most powerful user role available. Assign it to the person(s) you trust to manage your multisite.
Your IT person or web developer may be a good fit for this role.
Administrator
Administrators have full access to your WordPress site. They can install plugins, change themes, and manage users and site settings. This role also allows for managing all site content.
On a multisite, each network site can have a separate administrator. Administrators can only access sites where they hold this role, and a user can be assigned as an Administrator on multiple sites.
For example, if a multisite network has 50 websites within it, a Super Admin can access and manage all 50. Whereas an Administrator may only be able to access and manage a portion of those 50 websites, and also can’t change or manage anything at the network level.
The administrator role is powerful and potentially dangerous. A user could break a site or permanently delete content, while a hacker could install malware. Only assign this role to users who need this level of access.
You might assign this role to your web developer or a colleague responsible for full site management.
Editor
Think of Editors as content managers for your site. They can publish their own content and manage the work of other users.
Editors can’t install plugins or edit settings. This role strictly adds, removes, and edits pages, posts, or other content types. There’s a lower security risk when compared to an Administrator.
This role is a good fit for those responsible for publishing on your site.
Author
Authors can manage and publish their own posts. They can’t access site pages, or anyone else’s content.
Consider this role if you have a multi-author blog or news site. Each user can manage their posts, while higher-level accounts still have access to make changes.
Contributor
Contributors can write and manage their own posts but can’t publish them. A user with Editor or higher-level privileges must approve and publish their work.
The role could be useful on a site with a specialized workflow. Consider a news publication that accepts articles from freelance journalists. The publication’s content editor may want to review articles before publishing – this role allows them to do so.
Subscriber
Subscribers can manage a user profile on your website. They may also add comments on sites that use this function. This is the lowest-level role available in WordPress.
You may want to use this role on a membership site with restricted content. A Subscriber could access members-only content by logging in.
How and When to Create Custom User Roles
The default user roles aren’t perfect for every use case. Thankfully, WordPress lets you create custom roles. They’re handy for scenarios when a user needs to access more or less than a default role allows.
A need for niche functionality is also a good reason to add a custom role. Popular plugins such as WooCommerce and Yoast SEO include custom roles that allow users to perform plugin-specific tasks.
There are two methods for adding a custom role. The first is using the add_role() function that comes with WordPress. You’ll need to know how to write PHP code and have some background knowledge of WordPress user capabilities.
The second method is using a plugin such as User Role Editor. It offers a visual way to add custom roles and doesn’t require you to write code.
Want to see how it works? Here’s a step-by-step guide for creating a custom role with User Role Editor.
⚠️ Note: Please back up your website before performing any of the tasks in this tutorial. Better to be safe than sorry!
Video: How to Manager WordPress User Roles and Capabilities
Step 1: Install User Role Editor
First, log in to your WordPress website and navigate to Plugins > Add New.
Next, search for “User Role Editor” and find the plugin in the search results. Click the “Install Now” button.
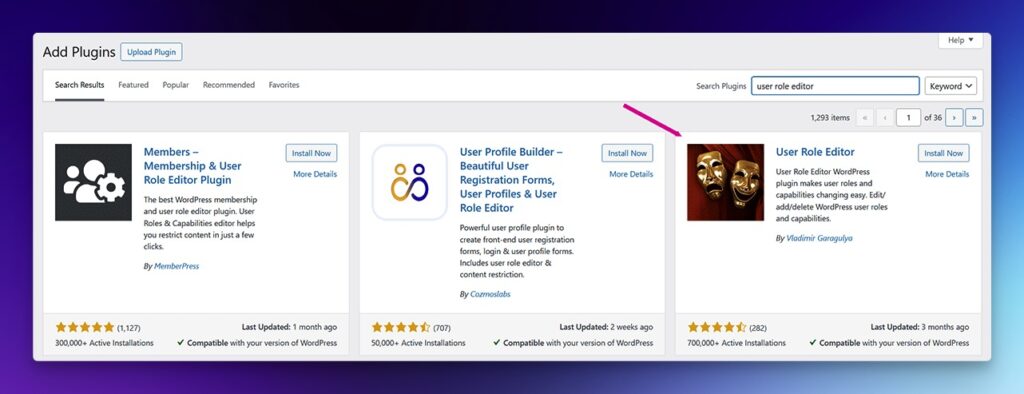
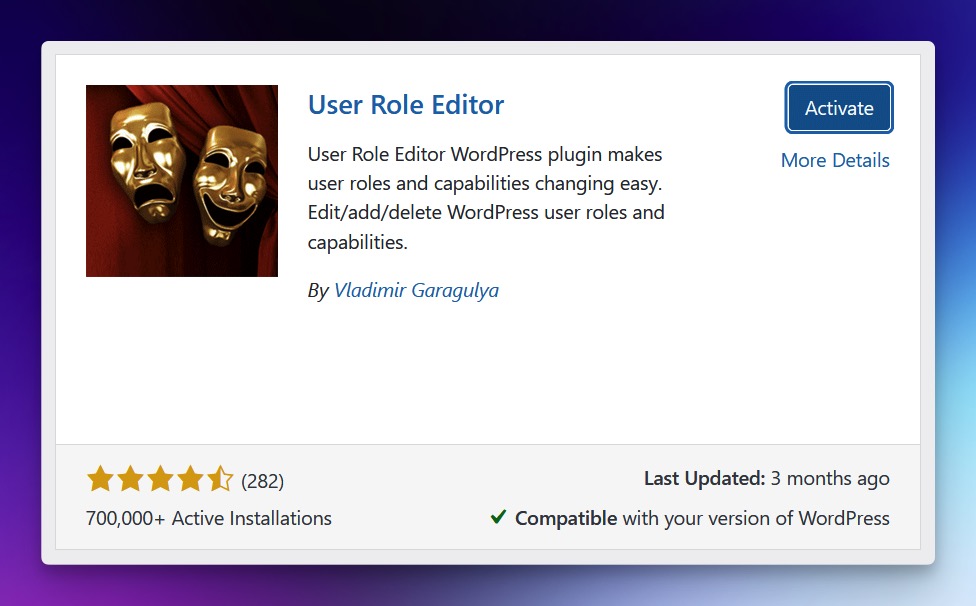
Allow the installation process to complete. Next, click the “Activate” button.
Step 2: Create a Custom User Role
Now it’s time to create a custom user role. Our example will include some niche functionality.
Let’s say our blog needs a user role that is somewhere between what the Author and Editor roles allow. Referencing the user role definitions above, we’ve established that Authors can’t access WordPress pages.
We’ll create a custom role allowing users to manage their own pages and posts.
Navigate to Users > User Role Editor to visit the plugin settings.
Once on the settings screen, click the “Add Role” button in the right column.

A dialog box will appear and ask for details about your new role.
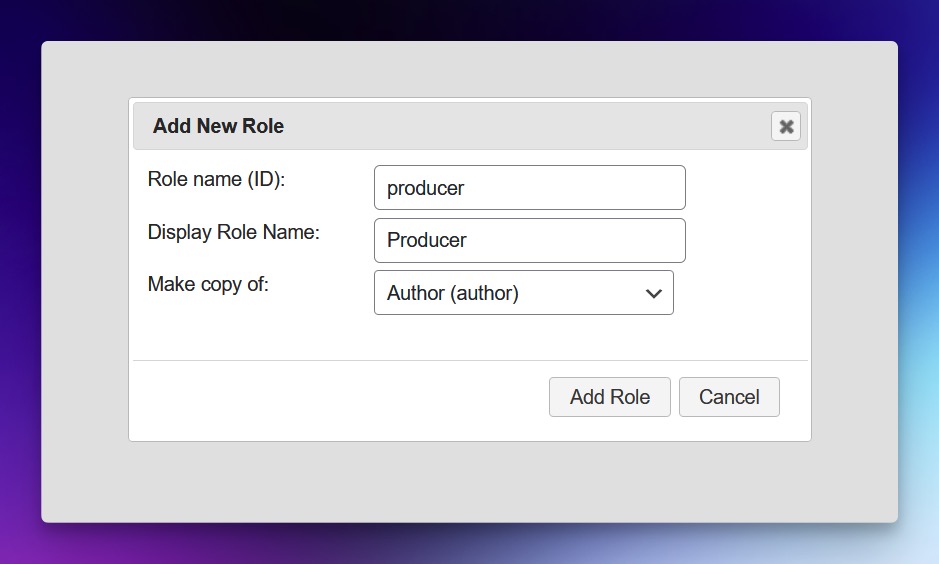
Our custom role will be called Producer. Here’s how we configured the settings:
Role name (ID): This is the ID for your new role. You can use letters, numbers, and underscores (_) here.
We set our ID to: producer
Display Role Name: This setting determines how the new role will be displayed in the WordPress admin.
We set our display role name to: Producer
Make copy of: The plugin allows us to base new roles on an existing one. This saves us from having to start from scratch.
We copied the Author role for our example.
To finish, click the “Add Role” button. The new Producer role will be displayed on the screen.
Step 3: Customize the New Role
Our custom role currently has the same capabilities as an Author. Let’s change that.
Make sure the Producer role is selected at the top of the screen. Next, look in the left column, titled “Group”.
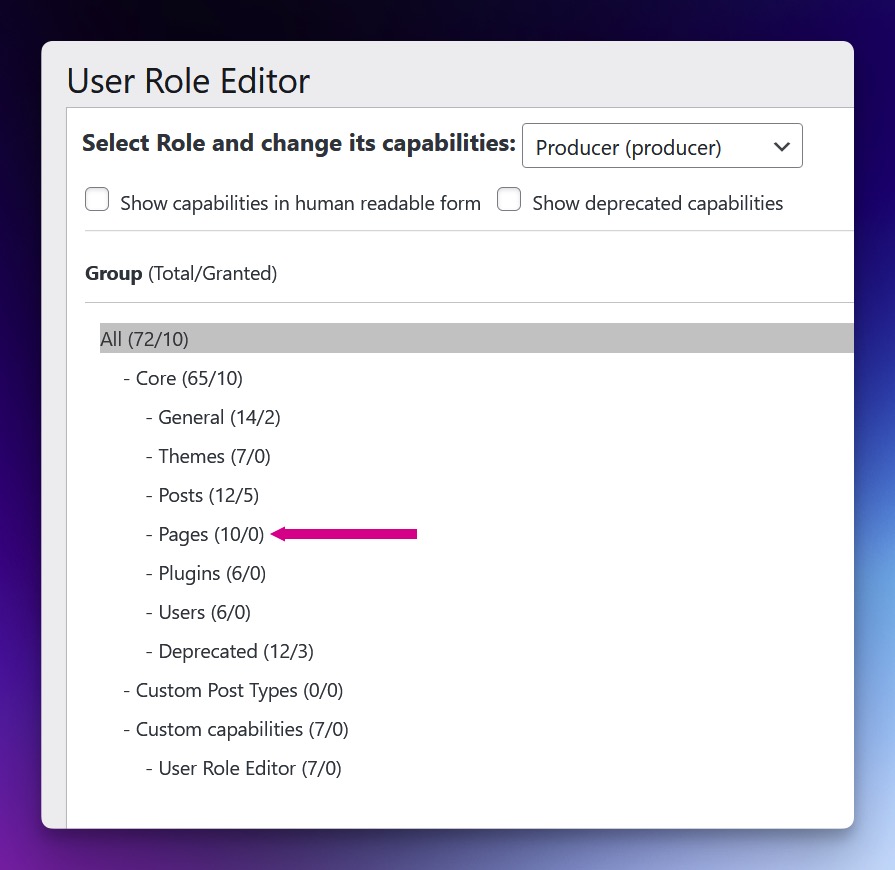
The Group column allows us to edit the various user permissions. By default, our role has 10 of the 72 available capabilities.
We want these users to add and manage their own pages. So, let’s click on the “Pages” item inside the column.

Looking at the middle column we see the Producer role doesn’t have any page-related permissions yet. We’ll click on the permissions we want this role to have:
- delete_pages: The user can delete their own pages.
- delete_published_pages: The user can delete their own published pages.
- edit_pages: The user can edit their own pages.
- edit_published_pages: The user can edit their own published pages.
- publish_pages: The user can publish their own pages.
⠀

Click the “Update” button in the right column to save these changes. The plugin will ask you to confirm them before saving.
Note: This mirrors the permissions users already have for WordPress posts. See them by clicking the Posts item in the left column.
Step 4: Create a New User
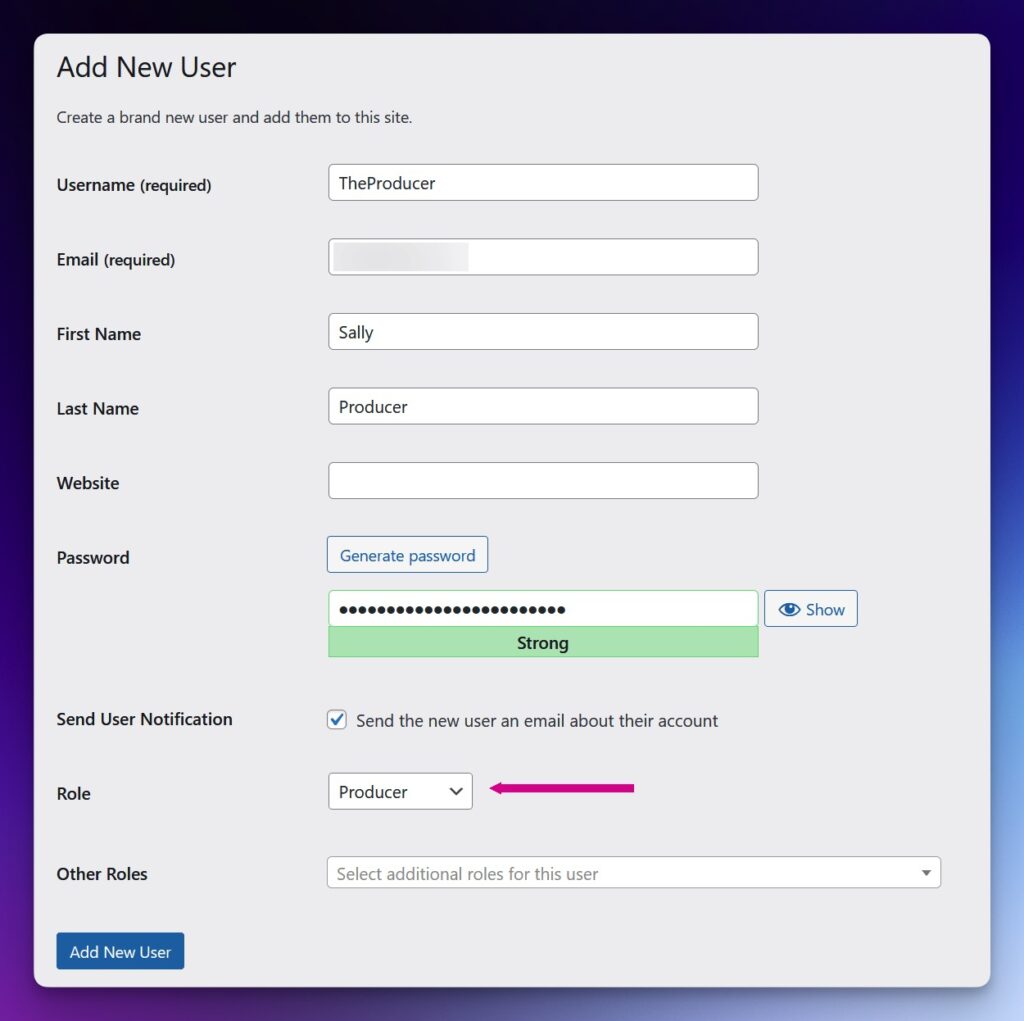
Let’s see how well our new role works by creating a new user. Navigate to Users > Add New.
We’ll fill out the user’s account information and assign them to the Producer role.
Step 5: Test the New User Role
The final step is to test our new user role. To do so we’ll log into the account we created in the previous step.
Things look good so far. We have access to the Pages menu in the WordPress admin. And we can’t edit any of the existing items created by the site administrator.
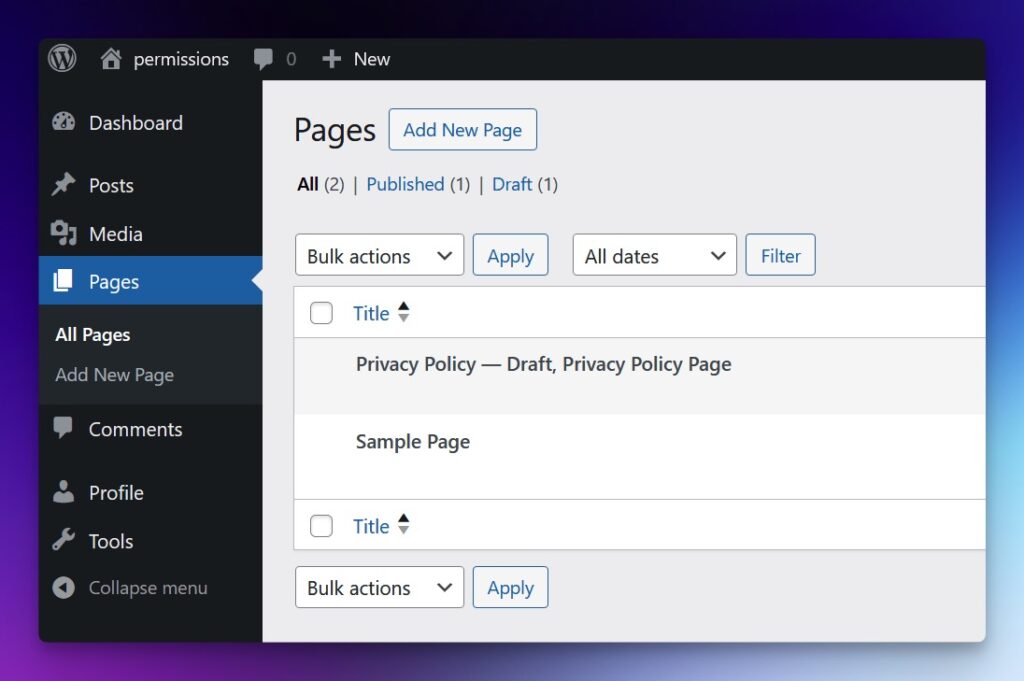
Let’s try to add a new page by clicking the “Add New Page” button at the top of the screen.
Success! We created a page and published it.
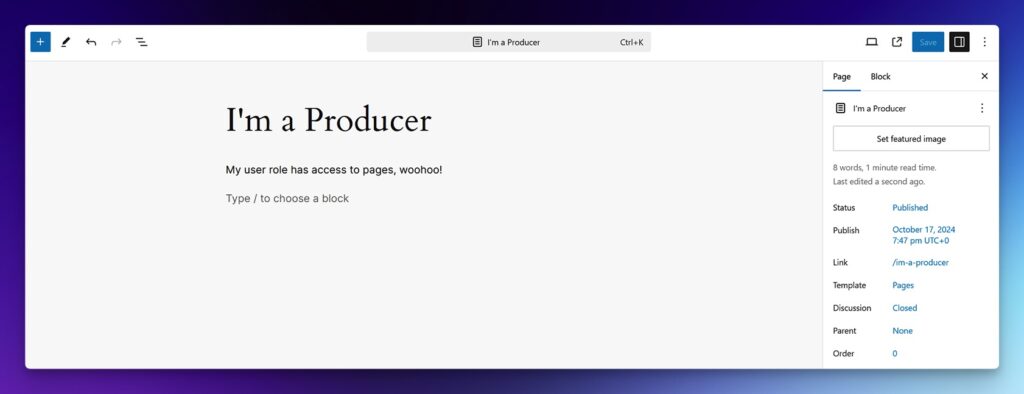
To test further, we can edit or delete our new page. We can also try the same thing with a WordPress post.
Our custom user role seems to be working smoothly, so let’s congratulate ourselves on a job well done!
A Note About Editing Existing Roles
It’s also possible to edit existing user roles. In our example, we could have added page-related permissions to the Author role.
The User Role Editor plugin can handle the task. You can choose an existing role in the plugin settings screen and edit it to match your needs.
We could also write code using the add_cap() and remove_cap() functions.
Editing an existing role may be more convenient in some cases. In the next section, we’ll explain why this may not always be the best strategy.
Things to Keep in Mind
We’ve covered the basics of WordPress user roles and capabilities. However, there is much more to learn and many responsibilities.
Here are a few things to keep in mind when assigning, editing, or creating roles:
- Limit the number of users with Administrator and Super Admin roles: Both roles should be reserved for those who need high-level access. Use the Editor role if you don’t want users to access plugins or site settings.
- Learn about user capabilities: It’s a good idea to study the different user capabilities that come with WordPress. You can learn more about them in the official documentation.
- Be careful when editing the default user roles: Changes made here will impact all users with that role – there could be unintended consequences. Always backup your site before making such changes.
- Using a plugin for user roles is a commitment: User Role Editor or similar plugins must remain active for your new or edited roles to stay intact. Removing the plugin also removes any changes you’ve made.
- Test your user roles: Want to see what a specific user can access? The User Switching plugin allows an Administrator to impersonate another user. We love this plugin so much we’ve included in our best WordPress plugins article!
The default user roles will be all you need in most scenarios. However, consider the above when making a user management plan. That will help you determine the impacts and best path forward.
Another Way to Keep Your Website and Users Safe
WordPress user roles are there to provide access based on need. By assigning the appropriate roles, you’re improving your website’s security. It also benefits user confidence, as they won’t worry about accidentally touching the wrong thing.
Even better, you can customize roles to fit your workflow. Several options exist for controlling what users can and can’t do.
Do you need help wrangling your site’s users? Think you might need a custom user role? SiteCare can help! As a trusted WordPress support company, we’ll make sure your site is secure, efficient, and tailored to your workflow. Sign up today to get expert support, or get in touch to discuss your needs.



Leave a Reply