
WordPress image optimization is one of those things every website owner knows they should be doing, but it often feels complex or a bit “out of sight, out of mind.” But here’s the thing: image optimization can make or break your site’s performance. It’s the difference between visitors feeling like they’ve stepped into a smooth-running, welcoming space versus waiting around for a laggy, slow-loading site.
I’ve been there—thinking image optimization was just a background task until I had to learn the hard way. Imagine a bulk optimization job that ends up nearly maxing out your disk storage overnight (yep, I’ll get to that in a bit!). So, let’s walk through what our team at SiteCare has learned over the years, including tips and real-life stories about image optimization, plus tools and common mistakes to avoid. My goal? To save you from the same headaches and help you create a faster, more engaging website for everyone who stops by.
Table of Contents
- Why Image Optimization Really Matters
- Choosing the Right File Format
- When to Use SVG Files
- Prepping Images Before Uploading
- My Bulk Optimization Nightmare
- WordPress Plugins for Image Optimization
- Pitfalls of Image Optimization
- Image Optimization Best Practices
Why Image Optimization Really Matters
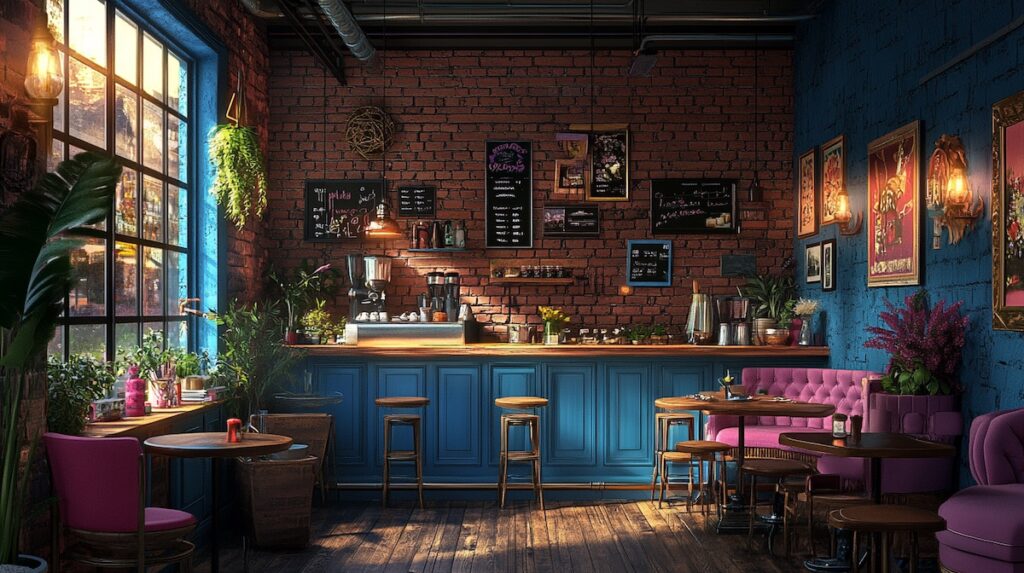
Think of your website as a cozy café. You want it to feel welcoming and easy to navigate. If people step in, place an order, and it takes forever to get served, they’re not coming back. Images, especially big unoptimized ones, are often the “traffic jams” in this metaphorical café, clogging up the process and frustrating visitors.
For WordPress users, optimized images mean faster load times, better SEO, and happier visitors. In fact, it’s not just a nice-to-have—it’s essential to building a site that performs well for everyone, whether they’re on a desktop or their phone. With the right approach, it doesn’t have to be complicated.
Choosing the Right File Format
Selecting the right file format is your first step in making images work harder and faster for your site.
.JPG: The Classic Standard
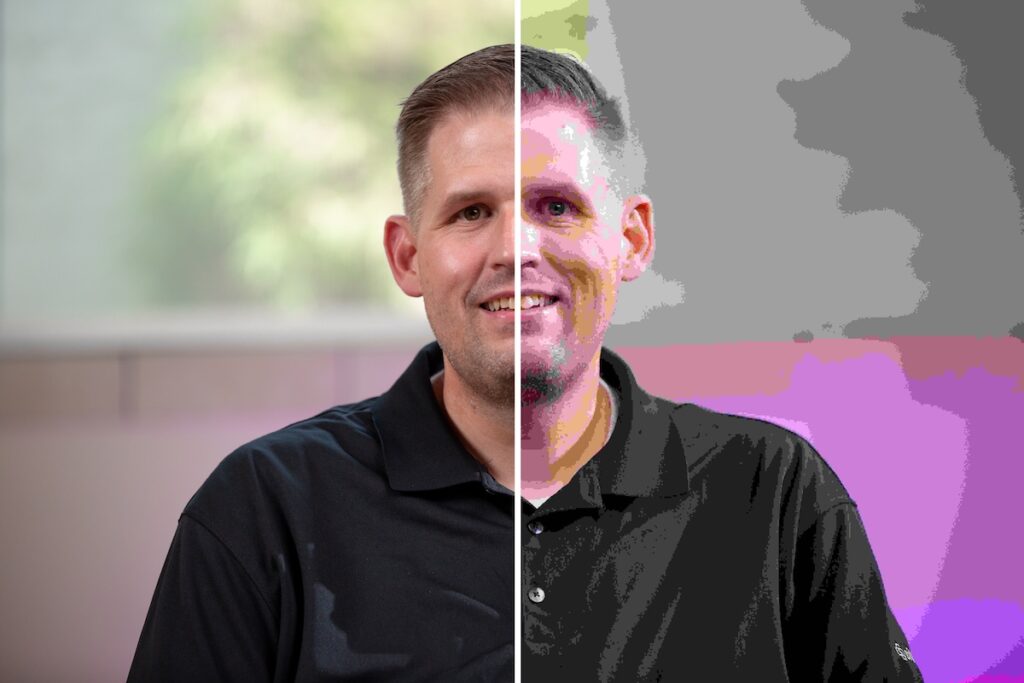
.jpg (or JPEG) is a long-standing standard for web images, especially photographs. It offers great quality with a small file size, thanks to lossy compression that discards some data to reduce size. However, when compressed too much, you’ll notice quality loss in the form of pixelation or blurring. It’s like making a photocopy too many times—eventually, you lose sharpness. Use JPG for photos but keep an eye on the compression levels to avoid losing clarity. Look at this example of an image that’s been overly processed by an image compression tool:
For High Quality and Higher File Size, use PNG
.png is the go-to for images requiring transparency (like logos) or when you need high quality without losing any details. PNG uses lossless compression, preserving every pixel’s data. The downside? PNG files tend to be larger, which can slow down load times. Think of PNG as a high-res print—perfect for certain images but not ideal for every occasion, especially if you’re aiming to minimize load times.
.WebP: The Modern Standard
For most WordPress sites, .webp is the ideal format. It’s the modern standard for web images, offering strong compression without sacrificing quality, and it’s widely supported across browsers. Think of .webp as a high-efficiency mode that can make your images about 30% smaller than PNGs or JPEGs without losing sharpness. Plus, it plays nice with social platforms, so you won’t run into compatibility issues.
AVIF: The New Kid on the Block
AVIF is a newer format that provides even smaller file sizes than .webp, but it’s still got some growing up to do. Major social networks and Google Image Search don’t fully support AVIF, which can limit your images’ reach. Stick with .webp for broad compatibility, but keep an eye on AVIF as it matures.
HEIC: High Efficiency for Apple Devices
HEIC (High Efficiency Image Coding) is an image format developed by Apple for high-quality photos with smaller file sizes. It’s commonly used as the default photo format on iPhones because it retains more detail than JPEG while using less storage space. However, HEIC’s compatibility outside the Apple ecosystem is very limited. Many web platforms and non-Apple devices don’t support HEIC, so using this format on websites isn’t ideal. Before uploading HEIC images to WordPress or any web platform, it’s best to convert them to a more widely supported format, like JPEG or WebP.
GIFs are Fun, but are they worth it?
GIFs (and we say it with a hard G because we live in a society!) have become popular for sharing short animations and screen recordings, thanks to their looping capability and easy compatibility across platforms. With modern screen recording tools, capturing GIFs is easier than ever; however, the files they generate are still large and not ideal for web use due to their hefty size and limited color range. We recommend using mp4 video files instead. They have a smaller file footprint and can be served from external services like Vimeo (our favorite) and YouTube, which helps with overall site performance.
When to Use SVG Files

SVG files (Scalable Vector Graphics) are a bit different from the typical image formats like JPG, PNG, and WebP. While those formats are raster images—made up of pixels and fixed in resolution—SVGs are vector graphics. This means they’re built from mathematical paths, not pixels, so they scale up and down without losing any quality. Think of SVGs as the ultimate “responsive” image format: whether you’re viewing them on a tiny phone screen or a giant desktop monitor, they stay crisp and clear. The other huge advantage to using SVG is that because they’re technically code, they have an extremely small file size footprint and load extremely quickly.
Best Use Cases for SVGs
SVGs shine when used for graphics that need to be ultra-sharp and versatile. Here’s where they’re especially useful:
- Logos and Icons: Since logos and icons are often displayed in various sizes, SVGs allow them to scale perfectly, without any pixelation. This makes SVGs ideal for branding elements on your site.
- Simple Illustrations: Illustrations with clean lines and minimal details (like diagrams or infographics) work well as SVGs and keep your file sizes small.
- Animations: SVGs support CSS and JavaScript animations, which can add subtle motion effects to your website without the need for heavy video files.
When Not to Use SVGs
While SVGs are fantastic for certain graphics, they’re not a good fit for complex images like photos or highly detailed visuals. Since SVGs are vector-based, they lack the richness needed to capture the gradients and depth of photographs. For these types of images, stick with JPG or WebP.
⚠️ SVGs and Security
One final note on SVGs: because they’re code-based, SVG files can sometimes present security risks if not properly sanitized. Make sure to use a trusted plugin like Safe SVG from 10up to handle SVGs in WordPress, especially if you’re accepting user-generated uploads, to keep your site safe.
Prepping Images Before Uploading
Before you even upload images to WordPress, there are some steps you can take on your computer that can save storage space and server resources.
For Desktop Users
Caesium: If you’re on Windows or Mac, Caesium is a nice little user-friendly tool for image compression. It compresses images quickly without sacrificing quality, allowing you to batch-process tons of images in one go. Imagine it as your “before-you-go” helper, ready to whip your images into shape so they don’t slow down your site. Try Caesium here.
ImageOptim: This is the Swiss Army knife of image optimization. It reduces file sizes by stripping out unnecessary metadata while keeping quality high. It has a broader feature set than Caesium with more granular controls. It’s also an open-source tool which we love! Download ImageOptim here.
Squash: Squash is a Mac Only app with some great tools for optimization as well as other batch optimization features. For example, you can rename 1000 images with the same naming convention, add a border or watermark, and make your file sizes smaller at in one batch process. It’s really slick! Check out Squash.
Web-Based Tool for Everyone
TinyPNG: TinyPNG is a web-based tool allows you to compress PNG and JPEG files without any software installation, so can be super handy for image optimization on the go. It allows you you download optimized files directly within your browser. Optimize with TinyPNG here. There is also an accompanying TinyPNG WordPress plugin as well that leverages the TinyPNG API.
My Bulk Image Optimization Nightmare

I’ll be the first to admit I didn’t fully understand the impact of bulk optimization until I tried it out on a WordPress site with over 100,000 media files. I figured I’d be saving some space by compressing everything. Little did I know that preserving the original files would nearly double the disk storage usage!
Waking up the next morning, I saw my disk space was almost maxed out. Bulk optimization had backfired—my host was sending me alerts, and I was scrambling to figure out what went wrong. Lesson learned: If you choose to preserve originals, be prepared for the significant storage hit. For larger media libraries, consider cloud storage solutions like Google Drive or Dropbox for originals, or double-check that your hosting plan can handle the extra space.
💻 Pro Corner: Server-Side Bulk WebP Conversion
If you’ve got a ton of images to handle, Austin Ginder’s bash script for bulk WebP conversion is a lifesaver. This script helps you convert large batches of images to WebP format in just a few commands, making it perfect for people managing big media libraries. It requires understanding the command line and bash, so it’s a bit more technical than most of what we’ll cover here, but it’s a great tool we felt we needed to mention. Find Austin’s webp conversion script here.
Plugins for Image Optimization in WordPress
WordPress plugins can handle the heavy lifting for image optimization directly on your site. Here are some popular plugins, with pros, cons, and tips on making the most of each one.
⚠️ Important Note: If your website has over 5,000 items in the media library, consult with a professional before installing or using any of these plugins and services.
Smush

- Pros: Smush is super popular and great for beginners. It’s easy to set up, offers bulk optimization, and even has lazy loading. It’s also compatible with a large range of WordPress products. The image processing is also done “in the cloud” which reduces strain on your web server.
- Cons: The free version has a 5MB limit per image, which can be an issue if you’re working with high-resolution files. The Pro version lifts the limit but comes with a subscription cost.
- Perfect For: Site owners who want a no-fuss solution to compress images without leaving WordPress.
ShortPixel
- Pros: ShortPixel gives you flexibility, offering both lossy and lossless compression, and it can automatically convert images to WebP. It’s especially well-suited for WooCommerce sites.
- Cons: ShortPixel uses a credit system, so if you have an image-heavy site, it can get pricey.
- Perfect For: E-commerce sites that need different compression options and those who want full control over optimization.
Imagify
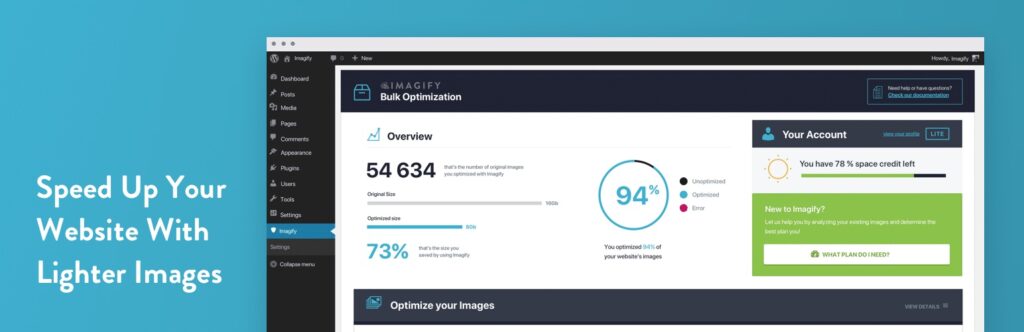
- Pros: Imagify, created by the team behind WP Rocket, our favorite WordPress caching plugin, is user-friendly and integrates well with other plugins. It offers a range of compression options, including “ultra” for max savings, and supports WebP conversion.
- Cons: Free usage is limited each month, so you’ll need to subscribe for more frequent optimization.
- Perfect For: Those looking for a reliable, set-it-and-forget-it solution.
EWWW Image Optimizer

- Pros: EWWW is unique because it offers unlimited image compression. It’s great for larger sites that need ongoing optimization and supports WebP conversion.
- Cons: It has a steeper learning curve, especially for users new to image optimization.
- Perfect For: Tech-savvy users who want fine-grained control and don’t mind a bit of setup.
Pitfalls of WordPress Image Optimization
Bulk Optimization Isn’t Always Your Friend
As I learned the hard way, bulk optimization can backfire. Some plugins that claim “lossless” compression may still degrade image quality slightly, so always test on a small set of images first. And if you’re preserving originals, make sure you have the storage space to accommodate both sets. Also, measure the impact of the images that are on your site already.
Avoid Relying on the WordPress Media Library for Storage
Think of WordPress as your storefront, not your warehouse. Keeping high-res originals in your media library can lead to storage bloat. WordPress automatically compresses and resizes images, so they may not stay in their original state. Store originals in cloud storage instead, like Dropbox or Google Drive, and reserve WordPress for web-ready files only.
Large Image Uploads Are a Server Strain
Uploading large images and expecting WordPress to do all the resizing and compressing is like bringing home raw beans and expecting your microwave to make chili. It can use up precious CPU and memory on your server, slowing down your site for visitors. Pre-optimize images before uploading to avoid unnecessary server strain.
Cloudflare Polish is A Smarter Alternative for Image Optimization

If you’re ready to skip plugin-based optimization altogether, Cloudflare’s Polish service offers an alternative that doesn’t rely on disk storage. Polish optimizes images “at the edge”—meaning images are optimized and compressed right before they’re delivered to your users, without taking up extra space on your server.
Polish provides automatic WebP conversion, adjusts quality as needed, and doesn’t add to your disk usage, making it a smooth, hands-off solution. At SiteCare, we recommend Polish as our go-to method for image optimization because it allows us to manage large media libraries without risking storage headaches or heavy server load. Learn more about Cloudflare Polish here.
Best Practices for Optimizing Images in WordPress
To get the most out of your image optimization efforts, here are a few practical tips that can make a big difference:
- Optimize Before Uploading: Using tools like TinyPNG, ImageOptim, or Caesium to compress images before uploading saves valuable server resources and keeps file sizes manageable from the start.
- Choose the Right Format for Each Image: Stick with WebP as your primary format for maximum compatibility and compression. Use JPGs for photography-heavy pages and PNGs or SVGs for logos, animations, or other graphics that require transparency.
- Keep Image Dimensions Under Control: Uploading high-res images straight from a camera might seem harmless, but they’re typically much larger than they need to be. Resize images to the largest display width they’ll need on your site. If the max width of your content areas is 1200px, there’s no need for 4000px-wide images.
- Audit Your Media Library Regularly: Just as you’d clear out unused files on your computer, make it a habit to clean up your WordPress media library. Delete unused images and duplicates to save disk space and keep your site organized.
- Consider Cloudflare Polish for Seamless Edge Optimization: If you’re ready for a more hands-off approach, Cloudflare Polish is a powerful solution. This approach, which we highly recommend at SiteCare, is perfect for larger sites or anyone managing a big media library.
Wrapping Up: Making Your Site Better for Everyone
Optimizing images may feel like a small part of your overall site strategy, but it’s one of those things that creates ripple effects for visitors, search engines, and your own peace of mind. With faster load times, better SEO, and a smoother browsing experience, everyone wins. Whether you’re a small business owner, a blogger, or a media-heavy site, these tools and tips will help you keep your site at its best.
By taking the time to choose the right formats, use efficient plugins, and try out services like Cloudflare Polish, you’re not just improving your own site—you’re contributing to a better web for everyone. So go ahead, give your images the optimization treatment they deserve. It’s one small step that makes a world of difference. For ongoing guidance and reliable website support, our team at SiteCare is here to keep your site fast, secure, and performing at its best.
Looking for advice on your image optimization strategy? Contact our team to get the help you need.
sitecare.com


Leave a Reply